Discord bot
Add the Truck Pulse bot to your Discord server, route announcements to channels, and keep Discord roles in sync.
What the bot does
Once the Truck Pulse bot is in your server, your Hub can:
- Post announcements — new applications, accepted members, upcoming events, promotions, completed deliveries and more, each to a channel you choose.
- Keep Discord roles in sync — a promotion on your roster updates the member's Discord roles automatically.
- Run your Hub with slash commands — staff can accept applications, approve leave, award points and more without leaving Discord. See Slash commands.
- Use your own bot identity instead of the Truck Pulse bot, on the Pro plan and above.
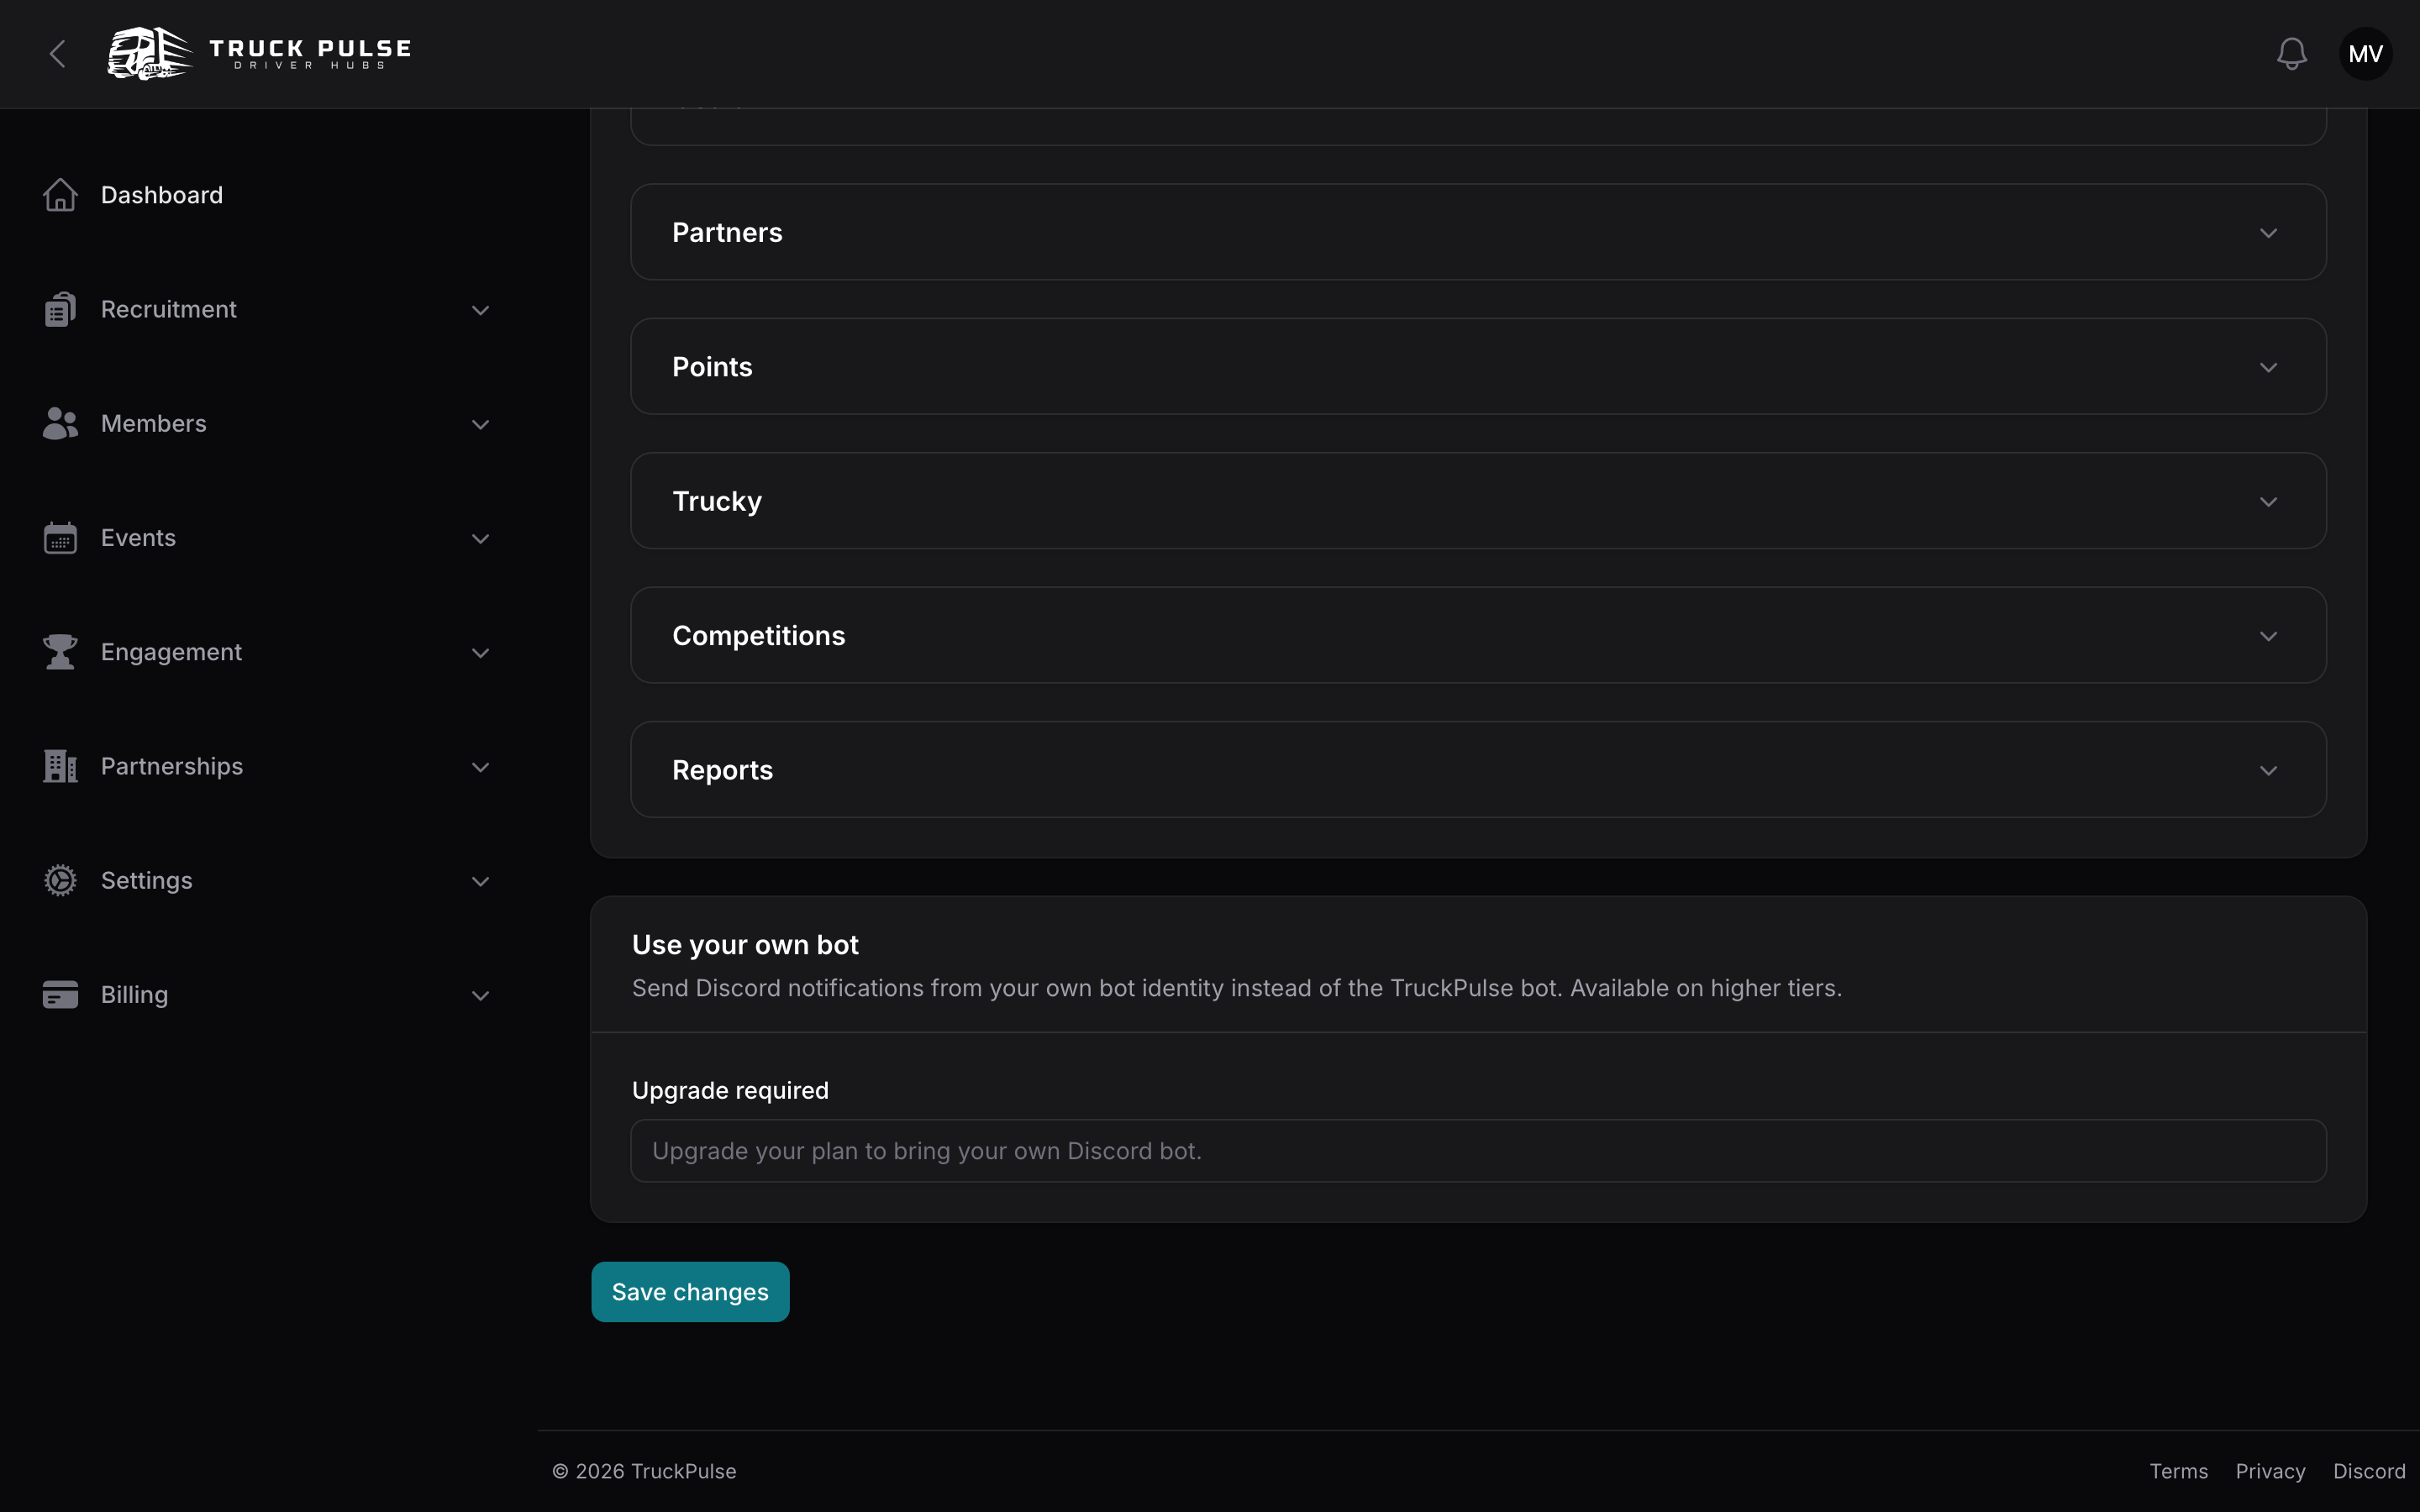
Everything lives on two pages in your Hub panel, both under Settings: Discord (the connection and channel routing) and Discord roles (role sync).
Add the bot to your server
You need to be a staff member who can manage Hub settings, and you need permission to add bots to your Discord server (usually "Manage Server").
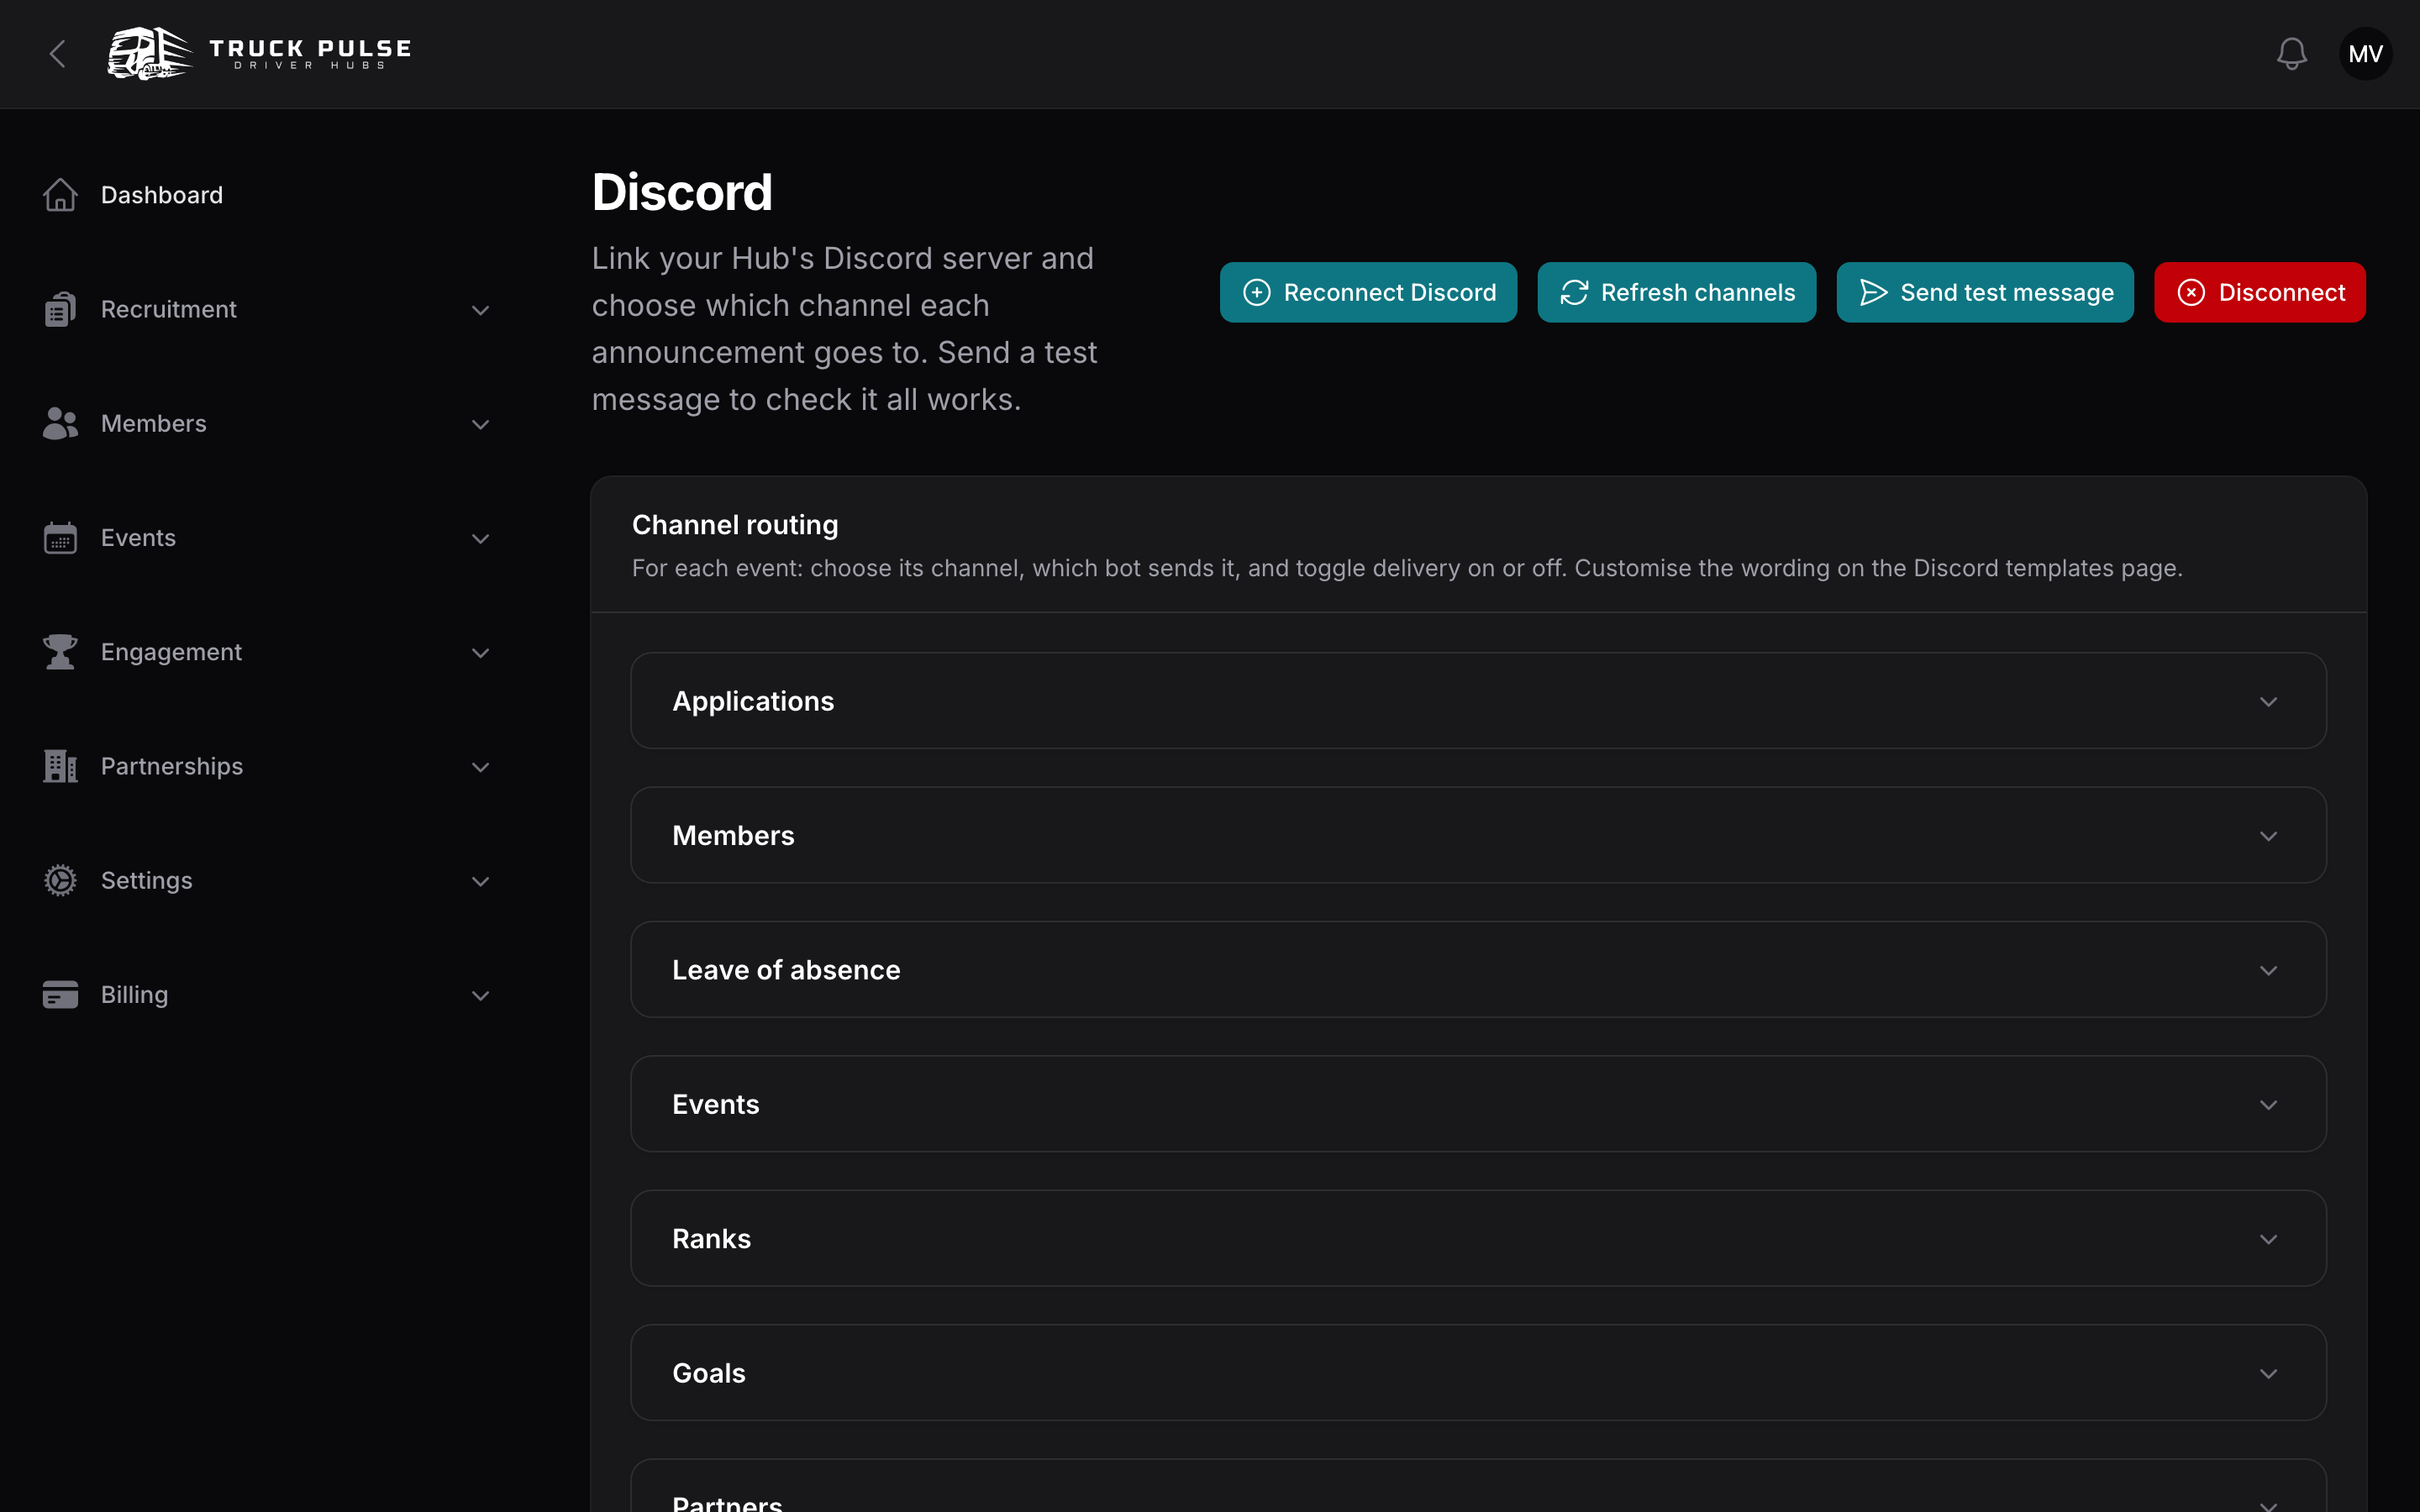
- In your Hub panel, go to Settings → Discord.
- Choose Add to Server. A Discord page opens in a new tab.
- On Discord's page, pick your server from the list and confirm. Leave the requested permissions ticked — the bot needs View Channel, Send Messages and Embed Links to post, and Manage Roles if you plan to use role sync.
📷 Screenshot coming soon — Discord's bot-authorisation screen with the server picker and permission list.
- Discord sends you back to the Discord page in your Hub panel with a "Discord server connected" message.
- Choose Test connection, pick a channel, and check the message lands in your server.
If you ever need to move the bot to a different server, use Add to Server again (it reads Reconnect Discord while connected). Disconnect removes the link entirely.
Check the connection status
At the top of Settings → Discord there is a status card showing whether the bot can currently post. It is the same view our support team sees.
- Not connected — no Discord server is linked yet.
- Connected — the bot is in your server and delivering.
- Delivery paused — the bot could not post, so announcements are being held. This happens when the bot is removed from your server, or loses the permissions it needs.
If delivery is paused, the card shows what Discord told us and when it happened. To fix it, use Add to Server to re-authorise the bot, then confirm it still has View Channel, Send Messages and Embed Links in the channels you route to. Delivery resumes by itself on the next successful send — you do not need to do anything else.
Nothing is lost while delivery is paused: queued announcements are held, not discarded.
We also email your Hub owner when delivery pauses. That alert cannot be switched off, because a paused Discord connection is otherwise easy to miss for days.
Choose which channels receive what
Each announcement type has its own channel, so applications can go to a staff channel while delivery announcements go to a public one.
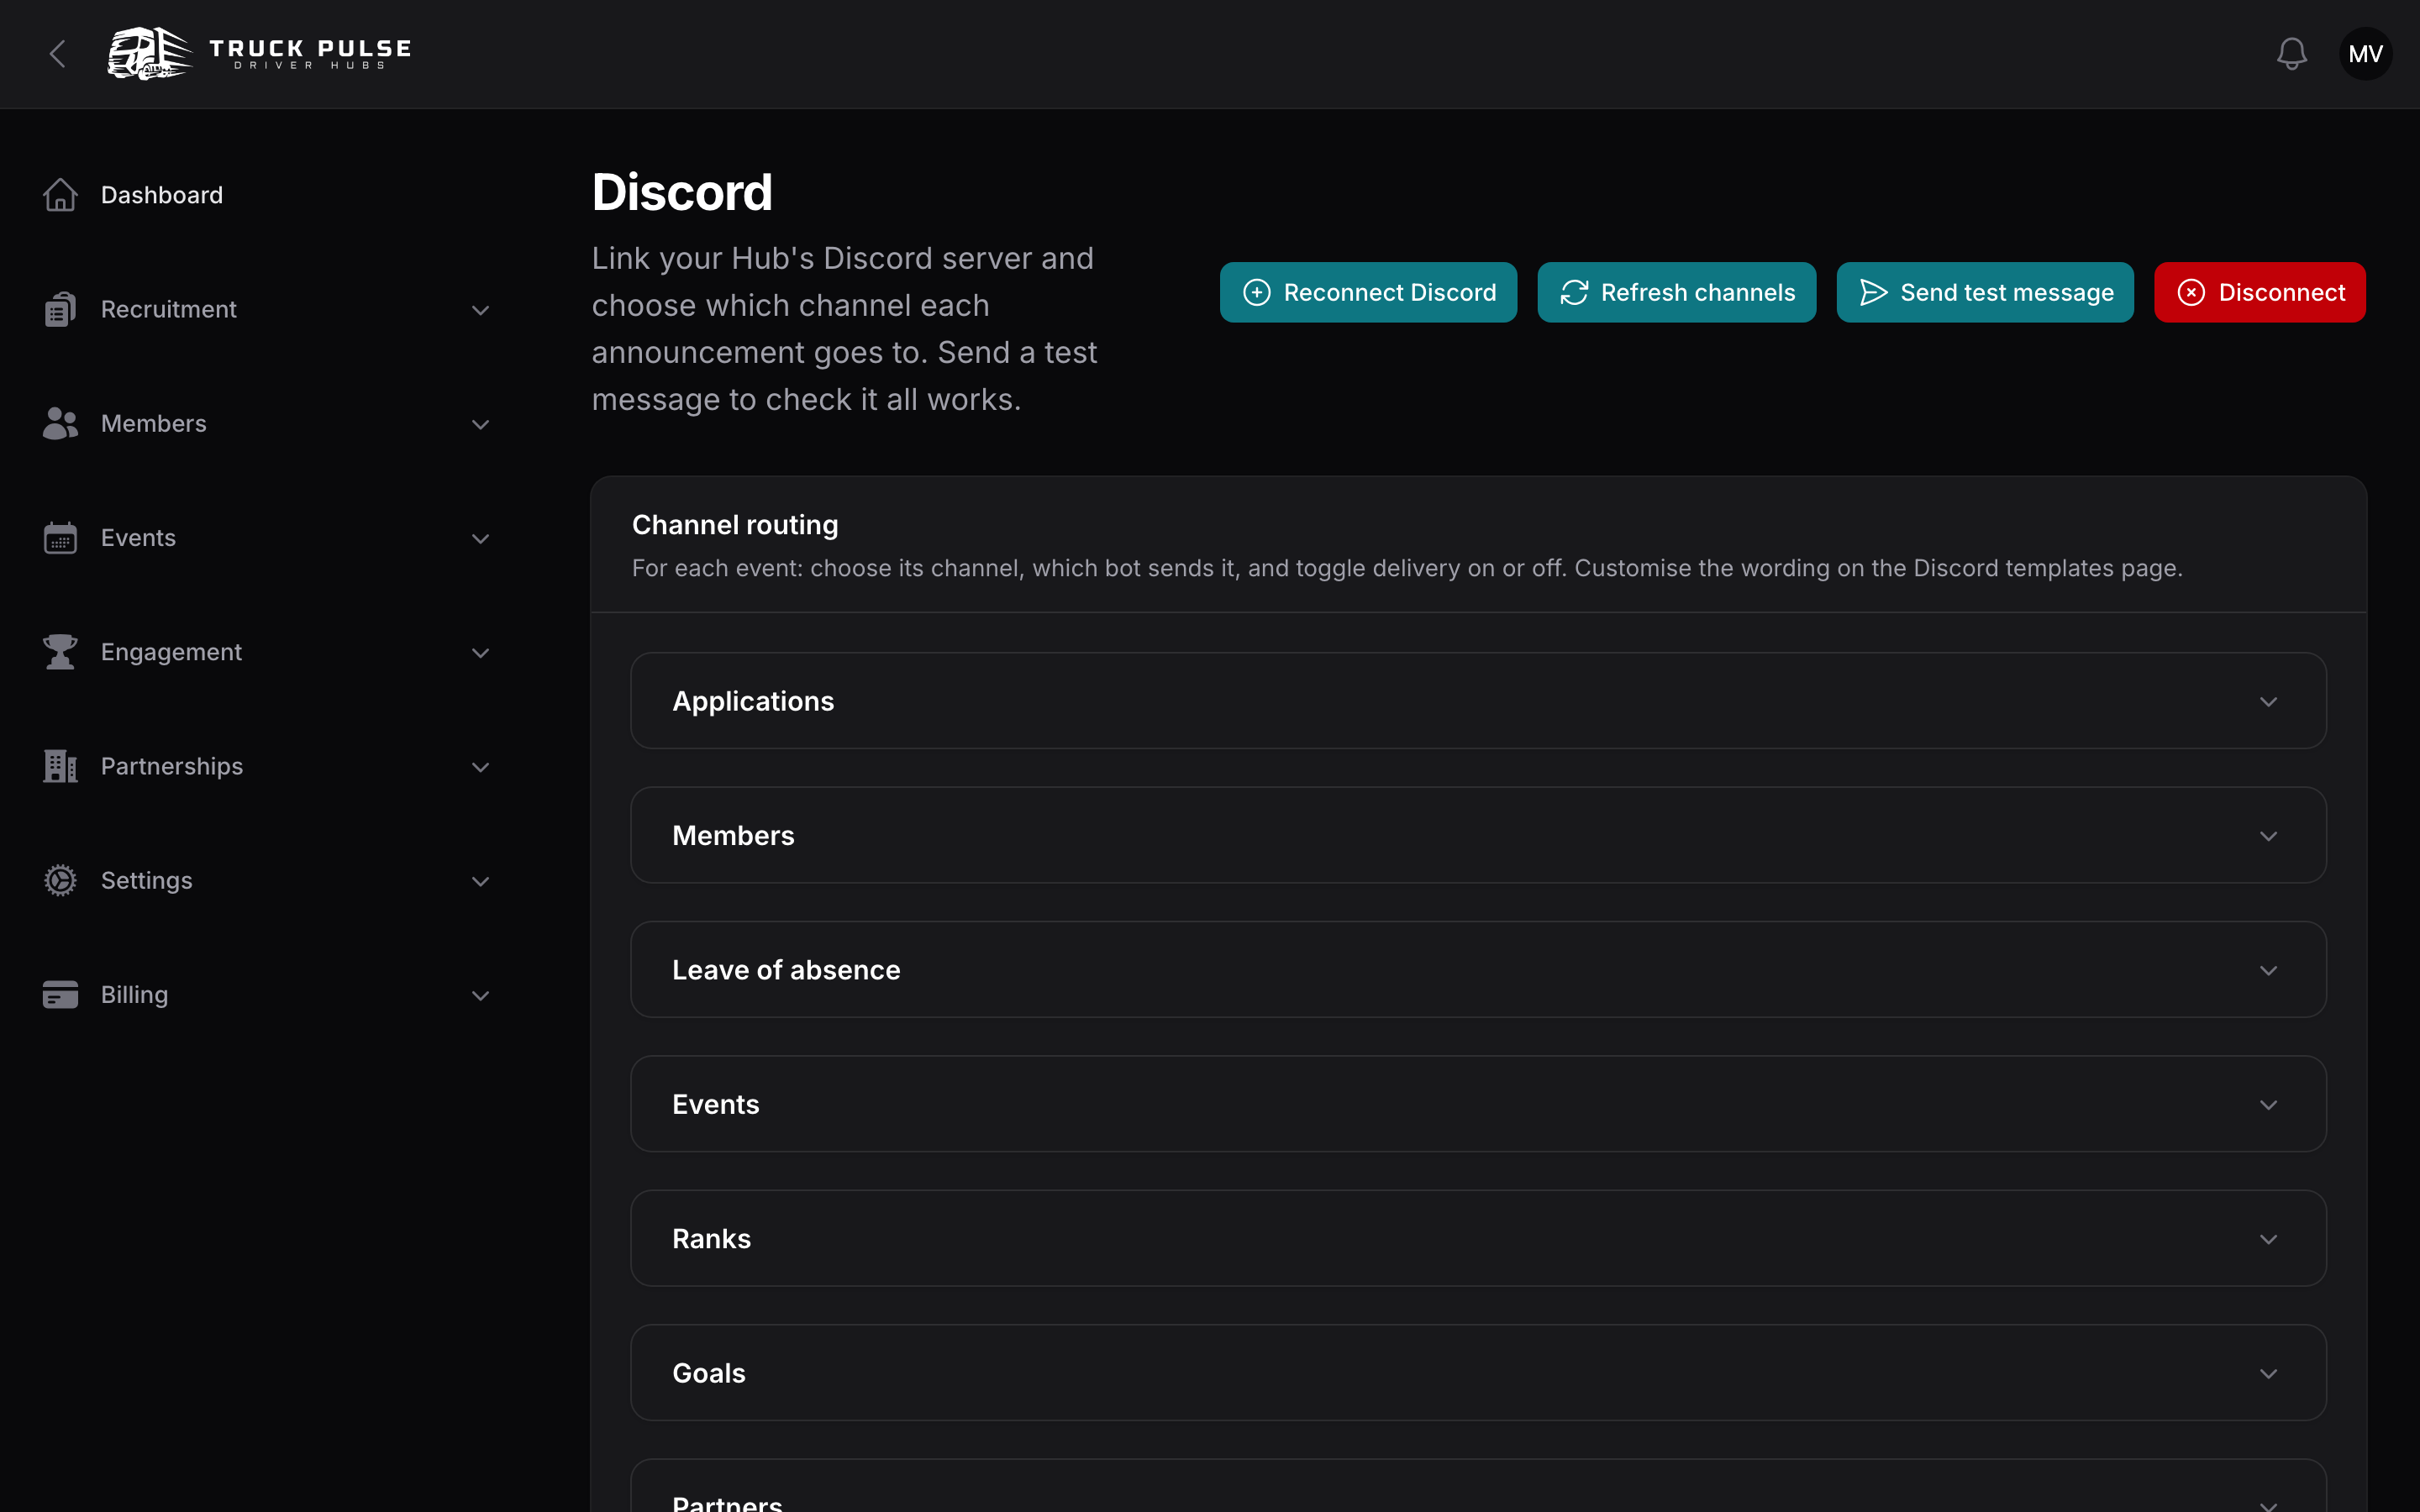
- On Settings → Discord, choose Refresh channels so the page lists your server's text channels.
- Open the Channel routing section. Announcements are grouped by area — Applications, Members, Leave of absence, Events, Ranks, Goals, Partners, Points, Deliveries — with a channel picker for each event.
- Pick a channel for every event you want announced. An event with no channel shows Off — don't deliver and is simply not sent. Events marked (recommended) are the ones most Hubs route.
- Choose Send test next to any event to post that announcement to the channel you picked, using sample details in place of real ones. It arrives looking exactly as the real thing will — your wording, your Hub's colour and logo — with the footer marked as a test so nobody mistakes it for a genuine announcement. You can test before saving, so try a channel out and move it if it doesn't look right.
- Choose Save changes.
Want different wording in the messages? The text of each announcement is edited on the message templates page — see Notifications.
Send each tracker's deliveries to its own channel
Deliveries reach Discord through one announcement whichever tracker logged them, so by default Trucky and TruckersHub deliveries share a channel. If you would rather keep them apart, the Deliveries section has two indented rows beneath Delivery logged:
- ↳ Trucky deliveries only
- ↳ TruckersHub deliveries only
Set a channel on one and that tracker's deliveries go there instead; the other tracker carries on using the shared channel above. Leave both showing Off — use the shared channel and everything lands in one place, as before. Send test works on these rows too, so you can confirm each tracker reaches the right channel before a driver logs anything.
Tracker webhook test works the same way, with its own pair of indented rows.
Keeping both trackers in one channel but want the message to say which logged the delivery? Add the
{{ tracker }} placeholder to the delivery template on the
message templates page.
Keep short deliveries out of the feed
A Hub running a lot of short city-hops can flood a delivery channel. Each tracker carries its own
Minimum delivery distance to post to the Discord job feed (km), on that tracker's own settings
page — see Trucky and TruckersHub. A delivery
shorter than the figure you set is not announced; leave it at 0 to announce everything. The two
are independent, so raising Trucky's threshold does not affect TruckersHub deliveries.
Keep Discord roles in sync
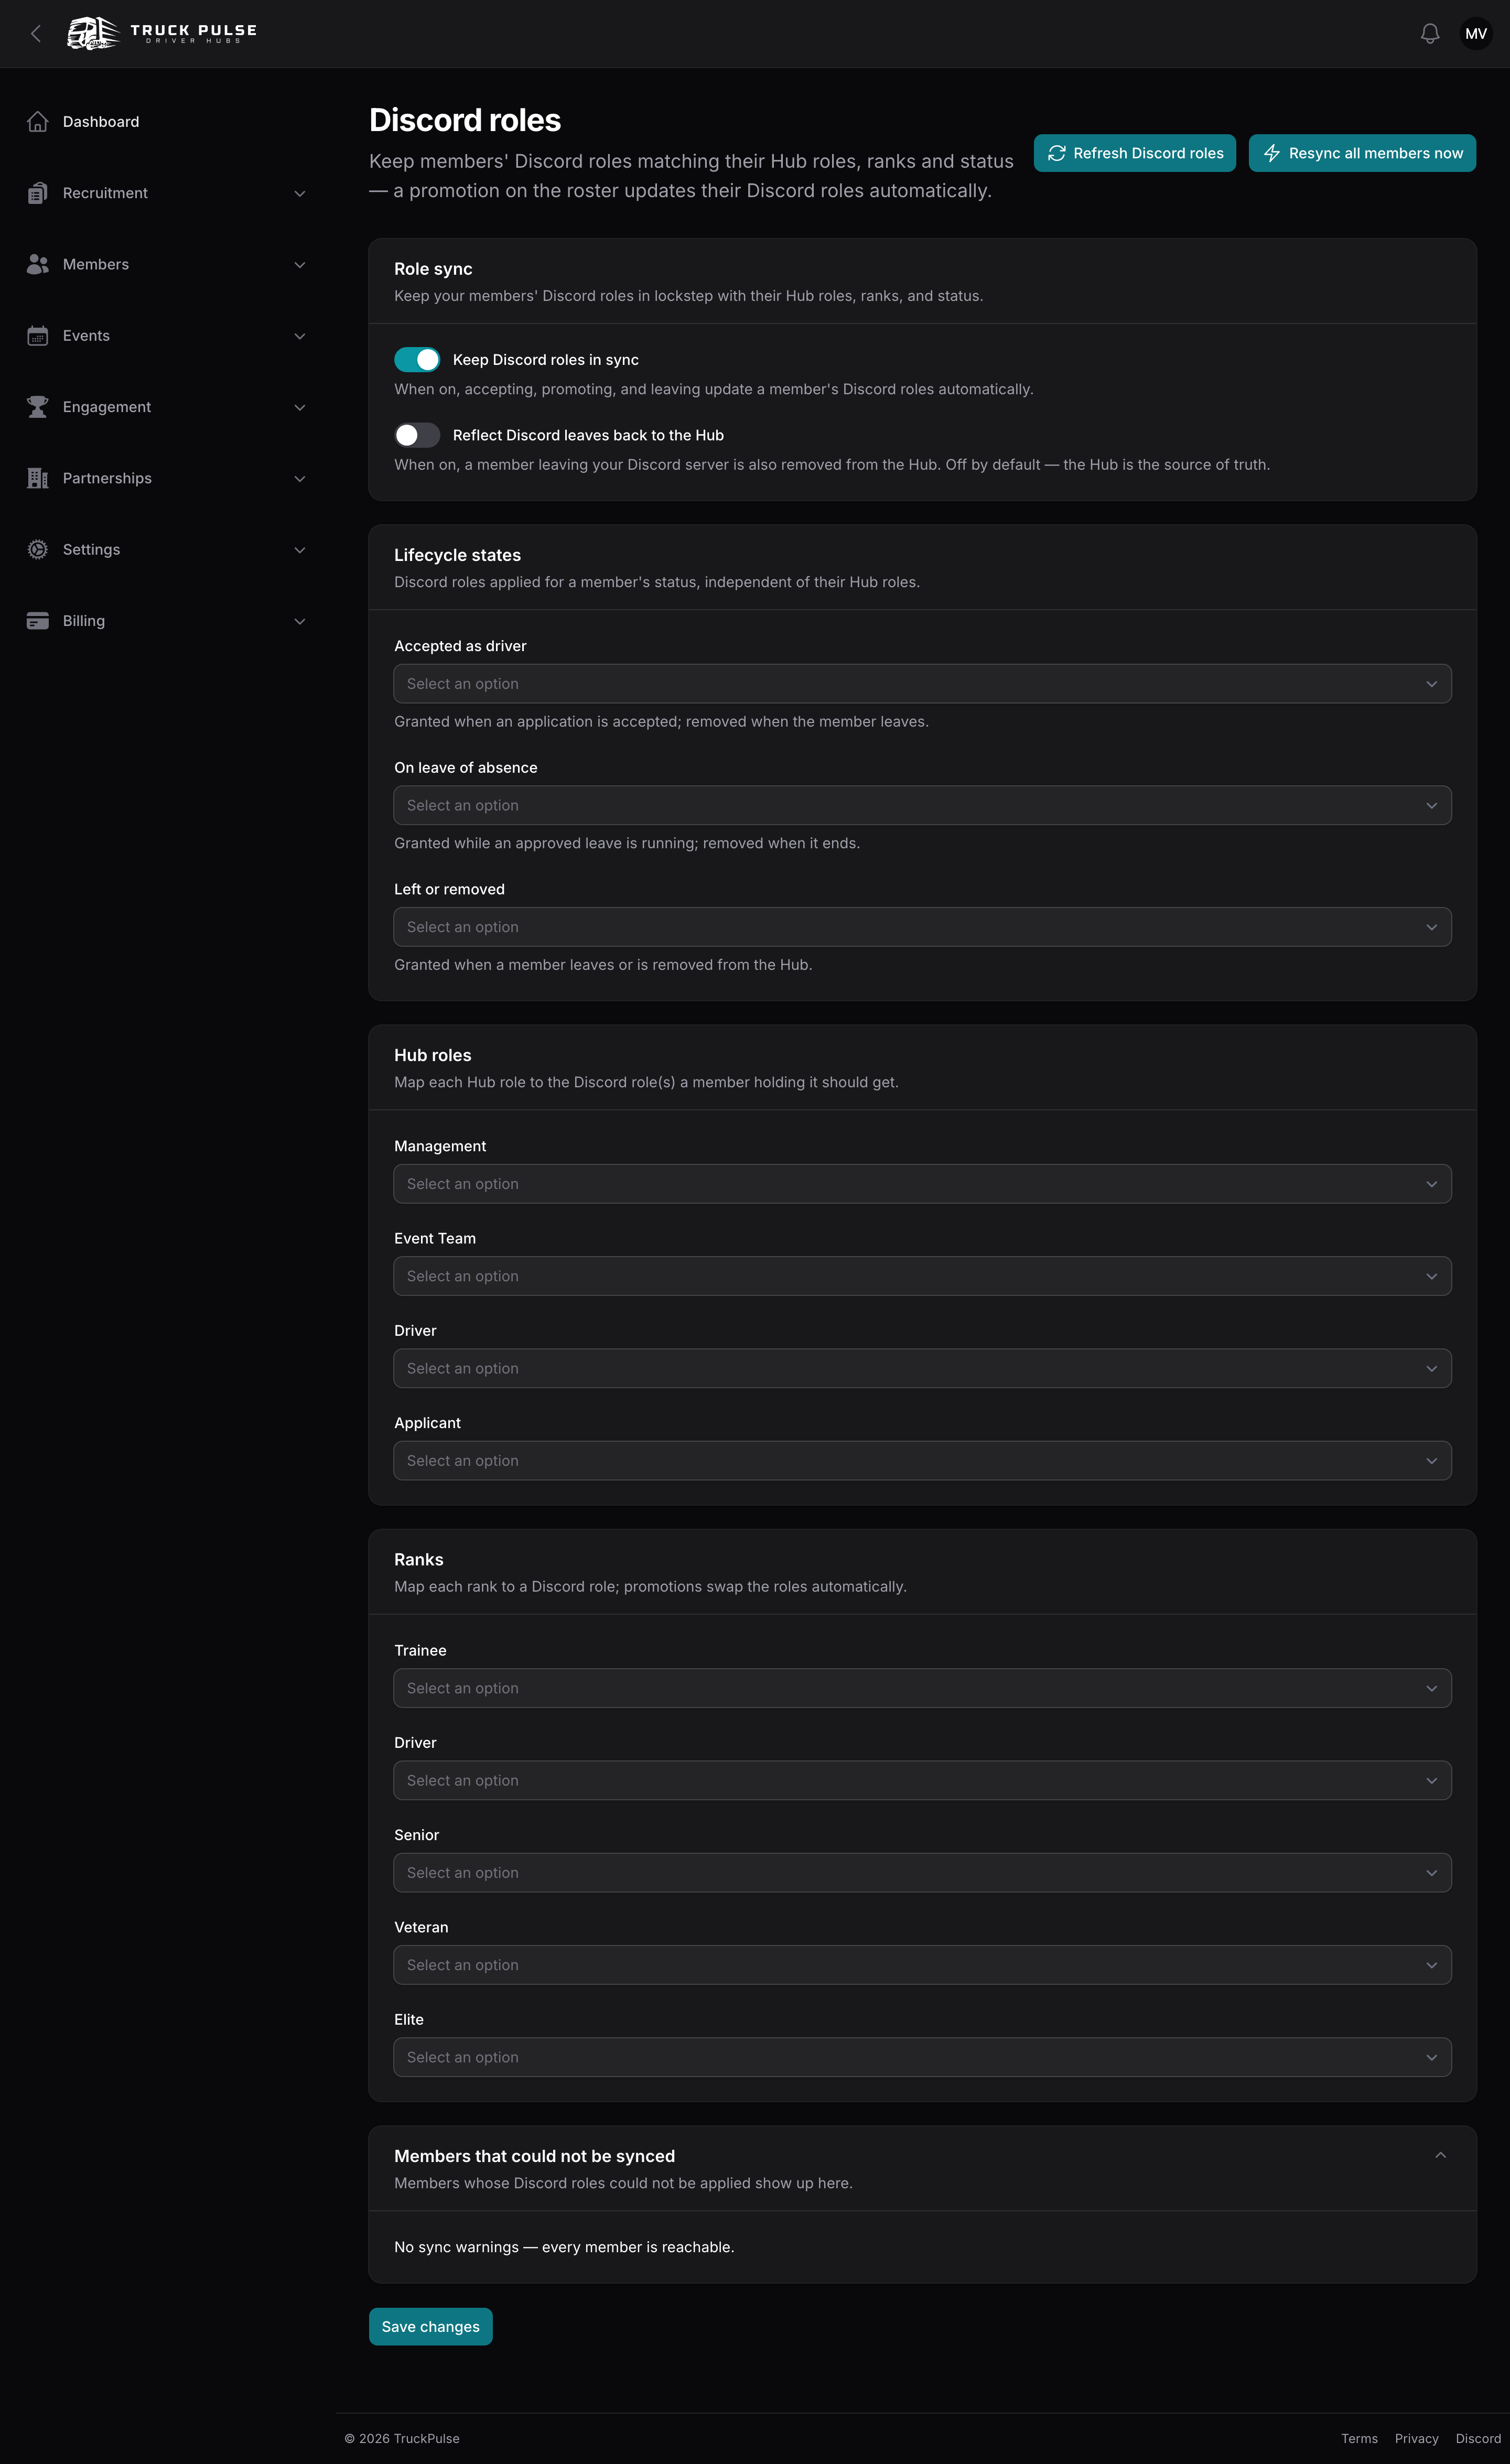
Role sync keeps your members' Discord roles matching their Hub roles, ranks and status. It flows from the Hub to Discord: accepting, promoting or removing a member updates their Discord roles; changing roles inside Discord does not change anything in the Hub.
- Go to Settings → Discord roles. Role sync needs a connected server (above) and the bot's Manage Roles permission.
- Turn on Keep Discord roles in sync.
- Choose Refresh Discord roles to load your server's roles, then map them:
- Choose Save changes, then Resync all members now to bring everyone in line at once. The resync runs in the background.
Two things worth knowing:
- Reflect Discord leaves back to the Hub is the one exception to the one-way flow: when it is on, a member who leaves your Discord server is also removed from the Hub. It is off by default — your Hub roster is the source of truth.
- The Members that could not be synced section lists anyone whose roles could not be applied — usually because they are not in your Discord server, or the bot lost its Manage Roles permission. Fix the cause and resync. A member who links their Discord account or joins your server after being accepted is picked up automatically; you do not need to resync for them.
- The Setup check at the top of the page tells you, before anyone is synced, whether the bot is still in your server, whether it has Manage Roles, and whether its own role sits above every role you have mapped — naming any role it cannot reach. Saving a map the bot cannot apply warns you straight away, and Re-check setup runs the check again after you change things in Discord.
- If the page says Discord is refusing some roles, the bot's role sits below a mapped role in your server's role list. Drag it higher, then choose Resync all members now — the fix is not applied on its own until the next nightly sweep.
📷 Screenshot coming soon — Discord's server role list showing the bot's role placed above the roles it manages. Discord only lets a bot assign roles that sit below its own role, so drag the bot's role up if mapped roles are not being applied.
Slash commands
The bot registers a set of staff commands in your server the moment it joins — there is nothing to set up. They let your staff run the day-to-day of the Hub without opening the panel:
| Command | What it does |
|---|---|
/application accept id |
Accept a driver application — same effect as accepting it in the panel (membership activated, applicant notified). |
/application reject id [reason] |
Reject an application, with an optional reason passed to the applicant. |
/loa approve id |
Approve a leave of absence request. |
/loa deny id |
Deny a leave of absence request. |
/driver stats driver |
Look up a member's distance, deliveries, points and current rank. |
/points award driver amount reason |
Award points to a member (or deduct them with a negative amount), exactly like a manual award in the panel. |
/event announce id |
Publish an event — the announcement and RSVP notifications go out just as if you published it from the panel. |
/recruitment status |
Open, close or set your Hub to invite-only recruiting. |
The id values are the numbers shown next to applications, leave requests and events in your Hub
panel.
A few things to know:
- Commands use your Hub's permissions. The person running a command must have their Discord
account linked to a Hub member, and that member needs the same permission the action requires in
the panel —
/application acceptneeds the "decide applications" permission,/points awardneeds "award points", and so on. See Roles & permissions. - Replies are private. The bot answers with a message only the person who ran the command can see, so lookups and decisions don't clutter your channels.
- Everything is on the record. Commands that change something (accepting an application, awarding points, changing recruiting status) are written to your Hub's audit log against the staff member who ran them, the same as panel actions.
Use your own bot
On the Pro plan and above, your Hub can send everything as its own bot — your VTC's name and avatar instead of the Truck Pulse bot. On the Free plan this section shows an upgrade prompt; see Billing.
First, create the bot on Discord's side:
- Create an application in the Discord developer portal and add a bot to it.
📷 Screenshot coming soon — the Discord developer portal's "New Application" and Bot pages.
- On the application's Bot page, turn on the Server Members Intent under Privileged Gateway Intents, and copy the bot token.
📷 Screenshot coming soon — the Privileged Gateway Intents section with Server Members Intent turned on.
- Invite your bot to your server with the same permissions as the Truck Pulse bot: View Channel, Send Messages, Embed Links and Manage Roles.
📷 Screenshot coming soon — the developer portal's OAuth2 URL generator with the bot scope and permissions ticked.
Then, back in your Hub panel:
- On Settings → Discord, open the Use your own bot section, paste the token into Bot token, and choose Save changes. The token is checked with Discord and stored encrypted.
- Each event in Channel routing now has a Send as picker, so you can send some announcements as your bot and others as the Truck Pulse bot.